Transcribing user interviews with Amazon Transcribe
Will Grant
on 15 April 2021
We try to do as much user testing as we can at Canonical, and one of the techniques that we employ is user interviews. Our UX team will talk to users regularly – usually there’s a user interview happening every day of the week.
Aside: if you’re interested, you can sign up to join the Canonical user interview panel.
A couple of weeks ago I had amassed a decent quantity of user interviews that I needed to transcribe. Necessity laziness being the mother of invention, I decided to look around for a “quick and dirty” solution to avoid typing out 4 to 5 hours of audio speech.
I had great results with the AWS ‘Transcribe’ service and had my transcripts done in 30 minutes – so, here’s a quick “how to” guide for using Amazon’s Transcribe service to create text transcripts of your user interviews.
Step one: prepare the audio file
Grab the video file that you’ve downloaded from Google Meet, (or Zoom, or your video conferencing tool of choice) and run it through ffmpeg to extract just the audio:
ffmpeg -i infile.mp4 outfile.mp3
If you don’t have ffmpeg, you can install it on MacOS with homebrew using
brew install ffmpeg
or, on Ubuntu:
sudo snap install ffmpeg
…or use the relevant package manager of choice for your OS.
Step two: upload the file
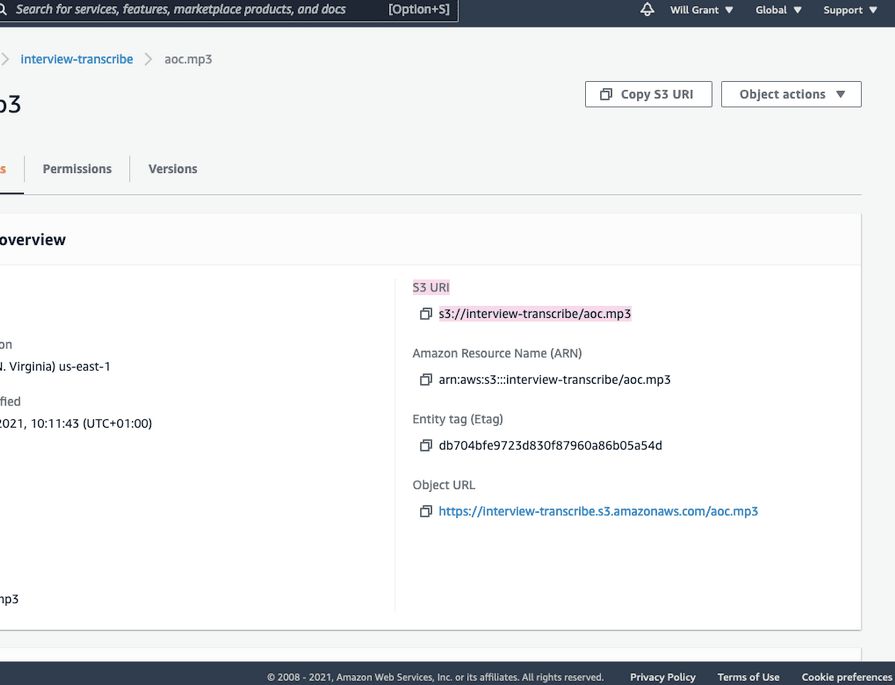
Upload the resulting .mp3 audio file you just created to an Amazon S3 bucket, and copy the “S3 URI”.

Step three: create a new Amazon transcribe job
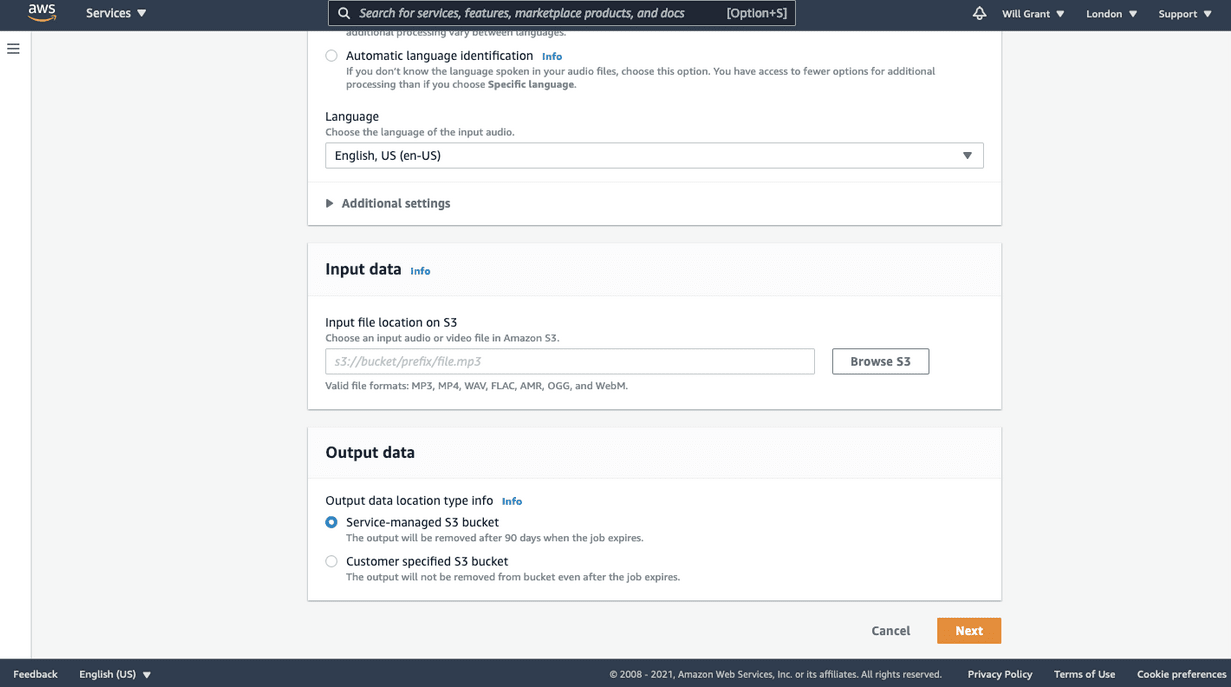
Visit the Transcribe console, and make a new job. Give it a name and then supply the URI of the object on S3, and leave the rest of the settings as their defaults.

Step four: see your transcribed audio
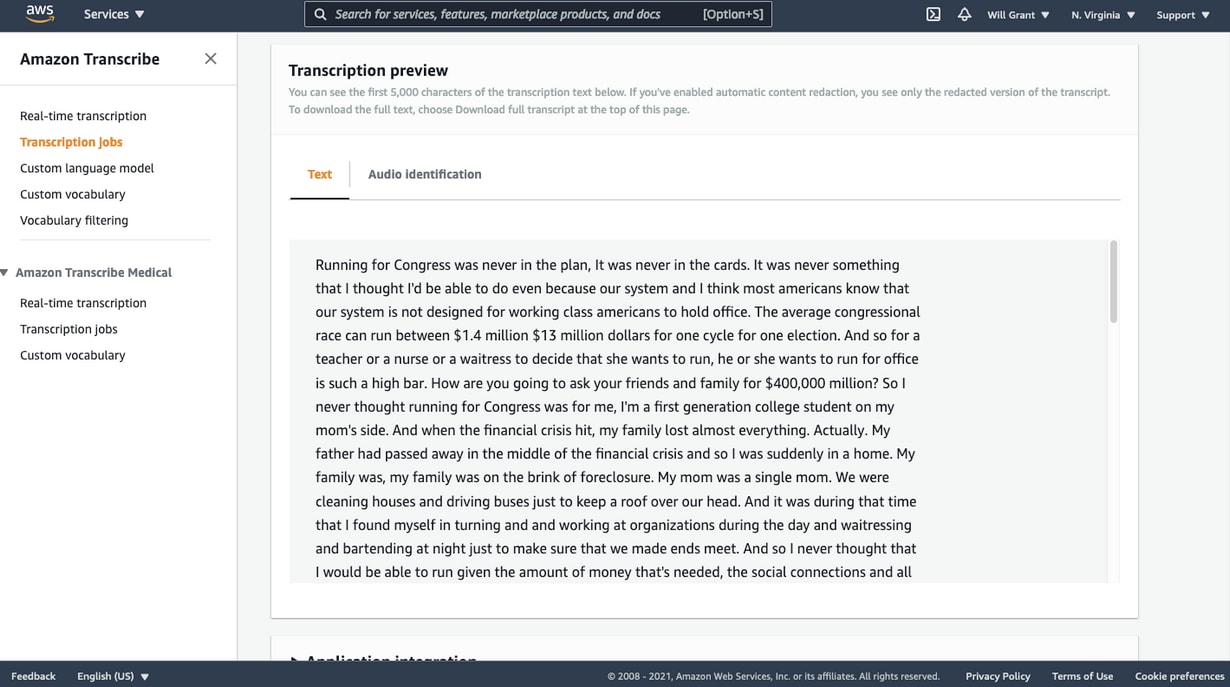
The text is displayed on the screen ready for you to copy and paste, or you can download a json file complete with timestamps if you need it.

Getting the transcription is just the start, of course – we need to analyse the meaning behind the words, annotate, identify take-aways and share the outcomes with the design team and product squad – but this shortcut definitely made my life easier this week.
You can see more of our work on Instagram @ubuntudesigners, follow us on Twitter @ubuntudesigners – and don’t forget to check open positions if you’d like to join our team.
Talk to us today
Interested in running Ubuntu in your organisation?
Newsletter signup
Related posts
UX Deep Dive: Classify interactions for a more intuitive user interface
We try hard to make our products as intuitive and familiar as possible, but there will always be “advanced” options and rarely-used features. So how do we...
How we ran an effective sprint to refresh our website, Part 1
Part 1 of how we ran a design sprint to refresh our website. Sharing what worked, what didn’t, and lessons from designing for open source in mind.
70% of IT teams spend more than 6 hours per week on security patching – new IDC research
Open source software is a popular tool for businesses for many reasons, but this adoption has introduced new challenges in maintaining their open source...
